A customer I’ve been working for has a large fleet of HP devices that used to be managed by SCCM. They leveraged the HP BIOS Configuration Utility to configure and secure the BIOS, which has been deprecated by HP somewhere mid 2022 (although it looks like it’s still receiving updates).
As they made the wise decision to migrate all of their devices to Workspace ONE, we made the effort to replace the (nearly?) deprecated HP BCU tool with the more recent HP CMSL PowerShell module.
To manage BIOS on Dell devices, plenty of documentation is available. For HP however, I couldn’t find much information. I was lucky enough to stumble upon this blog . I’ve used that great tutorial as a start and simply tweaked it here and there for Workspace ONE.
High Level Overview
To complete every step of this guide, you’ll be working with all of the components listed below. We’ll zoom in on each of them in the next sections.
- HP CMSL: HP offers the Client Management Script Library (CMSL) PowerShell module to configure BIOS and firmware of HP devices running Windows 10 and 11.
- BIOS configuration script (bundled in an app package): For each HP model in scope an application package has to be created that configures the BIOS settings as expected by the customer. The packages consist of following files:
- A PowerShell script that configures the actual BIOS settings
- An encrypted BIOS password file
- A key file used to decrypt the password
- A dummy executable (Workspace One UEM needs to have an executable in the package or won’t accept the upload. It’s just an empty file and thus is not contributing to the process)
- Freestyle Orchestrator is used to deploy HP CMSL and our BIOS configuration packages to the devices.
- Workspace ONE UEM Sensors are short PowerShell snippets used to collect data from devices, like BIOS settings
- Workspace ONE Intelligence to build some dashboards and reports
HP CMSL Application Package
HP CMSL is – in short – a PowerShell module that’s used to manage HP BIOS and firmware. Unlike Dell’s Command PowerShell Provider, The PowerShell module is available as an EXE bundled with all its dependencies. The HP CMSL installer can be downloaded on the HP support site.
Simply upload the EXE to the UEM console and provide following installation instructions:
Uninstall command:
C:\Program Files\WindowsPowerShell\HP.CMSL.UninstallerData\unins000.exe /VERYSILENT
Install command:
hp-cmsl-1.6.10.exe /VERYSILENT
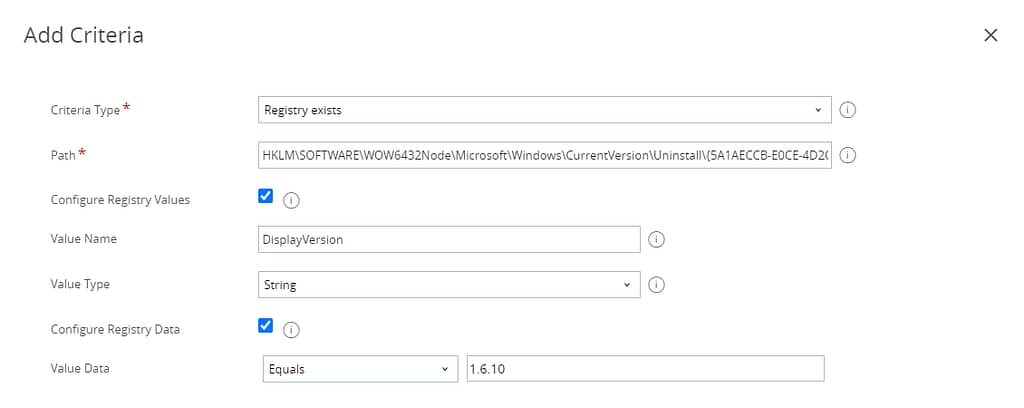
Detection criteria: HKLM\SOFTWARE\WOW6432Node\Microsoft\Windows\CurrentVersion\Uninstall\{5A1AECCB-E0CE-4D2C-833C-29CCEA959448}_is1 – DisplayVersion Equals 1.6.10
assignment:
Since we’re going to use Freestyle Orchestrator Workflow in our scenario, we need to set a default assignment rather than use direct assignment. As far as I know, this isn’t documented on any public facing KB, so I’ll take some time to explain this in detail.
If you distribute applications with Freestyle Orchestrator, it’s the smart group to which you assign the workflow that’s used to distribute the apps to target devices. Meaning there’s no need to add a direct assignment to the application.
However, Workspace ONE still needs a default assignment configured that determines the default deployment behaviour of the app when used in a workflow.
This default assignment needs to be assigned to a dummy (empty) smart group. Most convenient way to configure this dummy SMG is by creating a tag:
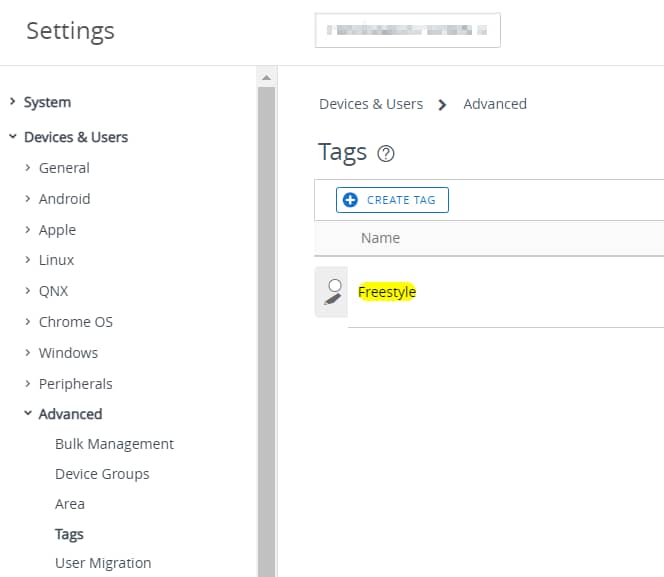
Next, we use that tag to build a smart group. There should be no devices in there!
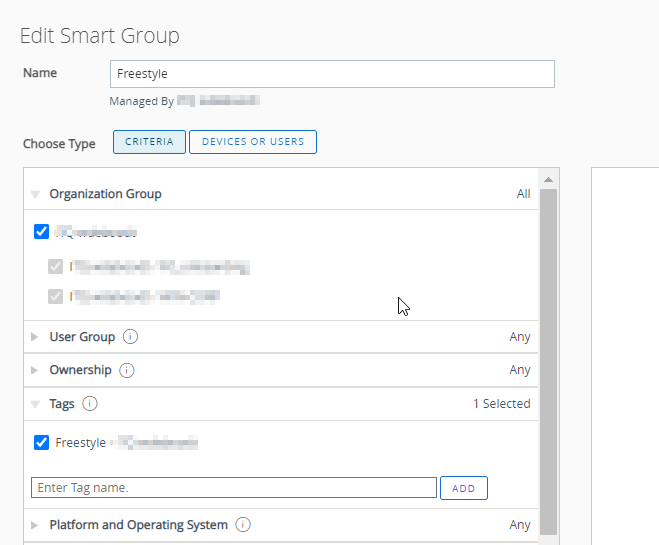
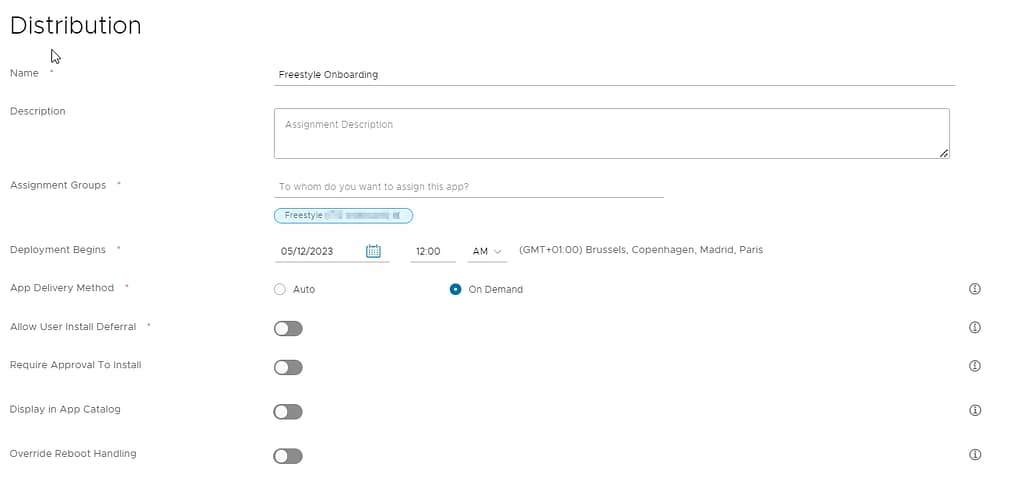
Next, set up the app assignment exactly as follows (leave everything disabled):

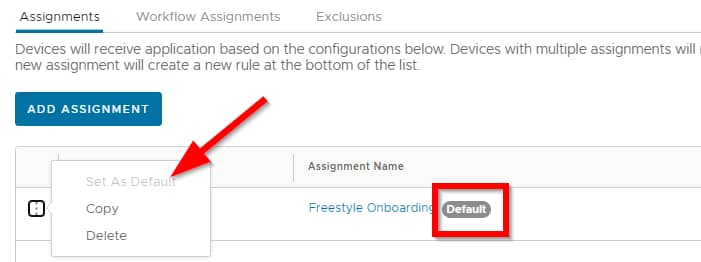
Ensure you see the Default option enabled:
BIOS Configuration script
First of all, you may wonder why I didn’t use the script functionality in Workspace ONE. Good question… I learned the hard way there’s a limitation in the length of the scripts you can upload to the UEM console. Even after stripping all the redundant code from the source script, I needed far more than the max number of characters (16K) for the more advanced HP models in use by the customer.
You can continue with the original script as is, but I decided to remove certain sections as these are redundant when used in a workspace ONE setup. Compared to the original script, I made following changes:
- Changed the log file location to C:\ProgramData\AirWatch\UnifiedAgent\Logs\bios.log. (By putting the log file here, the BIOS configuration log file is included automatically If you generate an Intelligent Hub log bundle)
- My customer was using a very short BIOS password, so I included some code to overwrite that with a more complex one.
- Removed the check if HP CSML is installed on the client system (By installing HP CMSL with Freestyle first, we already know it is available).
- Removed the logic that verifies we are running the script on an actual HP device (I’m assigning the Freestyle workflow to a smart group containing HP devices only).
- As I start the script by setting a BIOS password, I removed the logic that checks if a password is set in each of the actual BIOS configuration functions.
- Added a command that deletes the source package after a successful installation (we don’t want to leave the (encrypted) BIOS password on the system).
- Modified the registry key used to write the script ExitCode to: HKLM:\SOFTWARE\<Company>\BIOSSettings
You can find an example package on my Github page.
Since I had to build dozens of these packages for the project I was working on, I created a template script and a file that lists all settings I ever required. To build a new package for a new model, I simply copy the settings I need and paste them in the template. Creating these BIOS packages for new models takes me just a couple of minutes.
Before you upload your own package to UEM, make sure the settings you try to configure are actually supported on your model. Verify this by running the following PowerShell command on a reference machine:
Get-HPBIOSSettingsList -Format briefOnce you’re done configuring the BIOS script, we need to generate an encrypted password and key file. Simply replace the password string in this little script, run it and store the key and password files together with your script.

Lastly, Workspace ONE UEM expects an executable in the package we upload to the UEM console, so we need to add a dummy executable like BIOS.exe.
If all went well, you should now have 4 files:
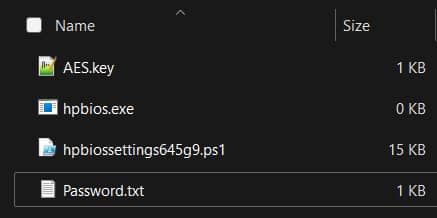
Select these 4 files (not the parent folder!) and compress them in a zip file to be uploaded to the UEM console.
Uninstall command: na
Install command: powershell -executionpolicy bypass -file hpbiossettings835g8.ps1
Detection: registry exists -> HKLM:\SOFTWARE\<CompanyName>\BIOSSettings -> value name: ExitCode -> String -> Equals 0
(if the script executed successfully, it will write this ExitCode 0 to the registry)
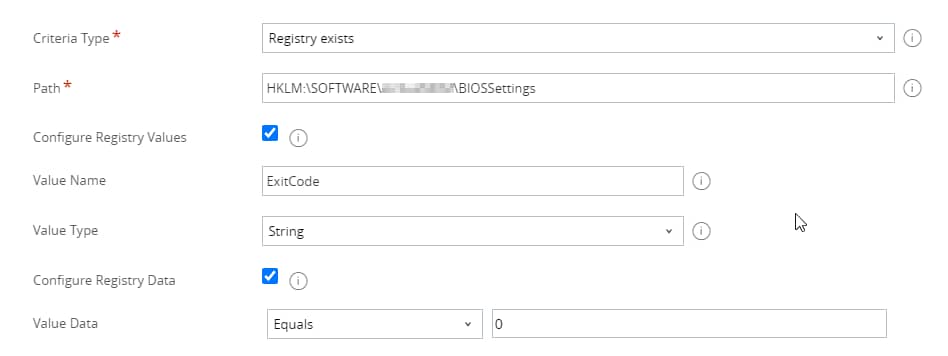
Assignment: Use the exact same assignment settings as you used for HP CMSL.
PS: No need to explain you should properly test your script first before rolling this out to all your devices!
Freestyle Orchestrator Workflow
Now that we have our main components ready, we’re almost ready to start building our Freestyle Workflow. All we need is a smart group that contains our HP devices, to which we will link the workflow.
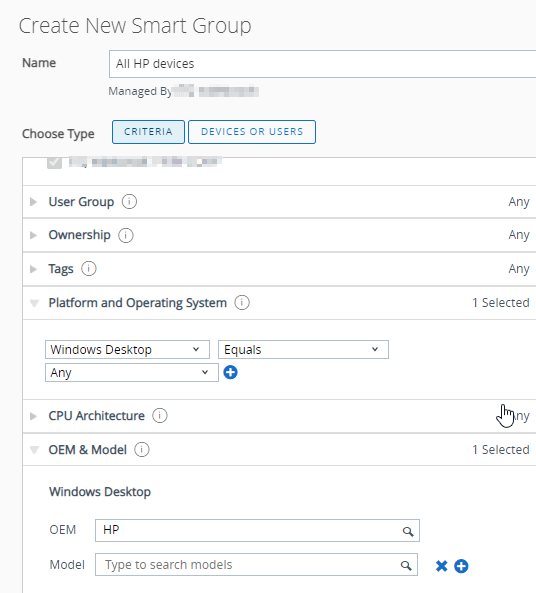
Now let’s build our workflow. I chose to build just one workflow for all models, but you could opt to create seperate flows for each model you have.

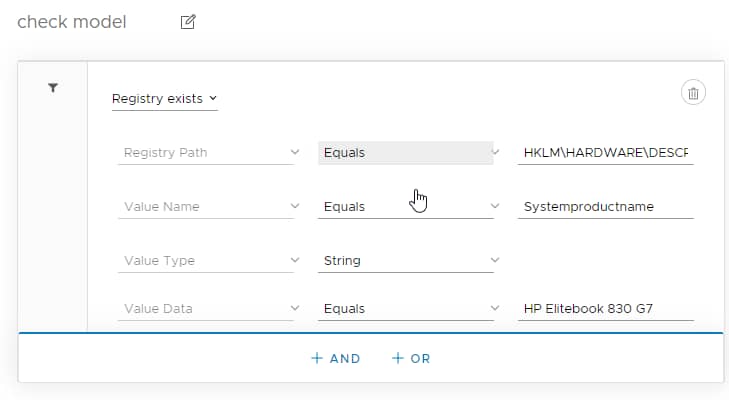
As you can see, I’m using a condition check to install the correct BIOS script package to each model:
Registry Exists
Registry Path Equals HKLM\HARDWARE\DESCRIPTION\System\BIOS
Value Name Equals Systemproductname
Value Type String
Value Data equals <model number> (e.g.: HP Elitebook 830 G7)
Sensors
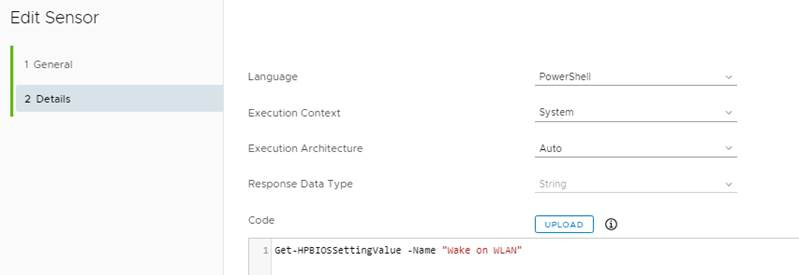
Workspace ONE does not collect BIOS configuration values by default, so we need some sensors to report back the data to the console. Sensors to gather HP BIOS settings are extremely easy to create. Here are a couple of examples:
| code | purpose |
| Get-HPBIOSSetupPasswordIsSet | Verify if a BIOS password has been configured |
| Get-HPBIOSSettingValue -Name “Secure Boot” | Checks if secure boot is enabled |
| Get-HPBIOSSettingValue -Name “UEFI Boot Order” | Returns UEFI boot order |
| Get-HPBIOSSettingValue -Name “Fingerprint Device” | Checks the Fingerprint device status |
Workspace ONE Intelligence Dashboards
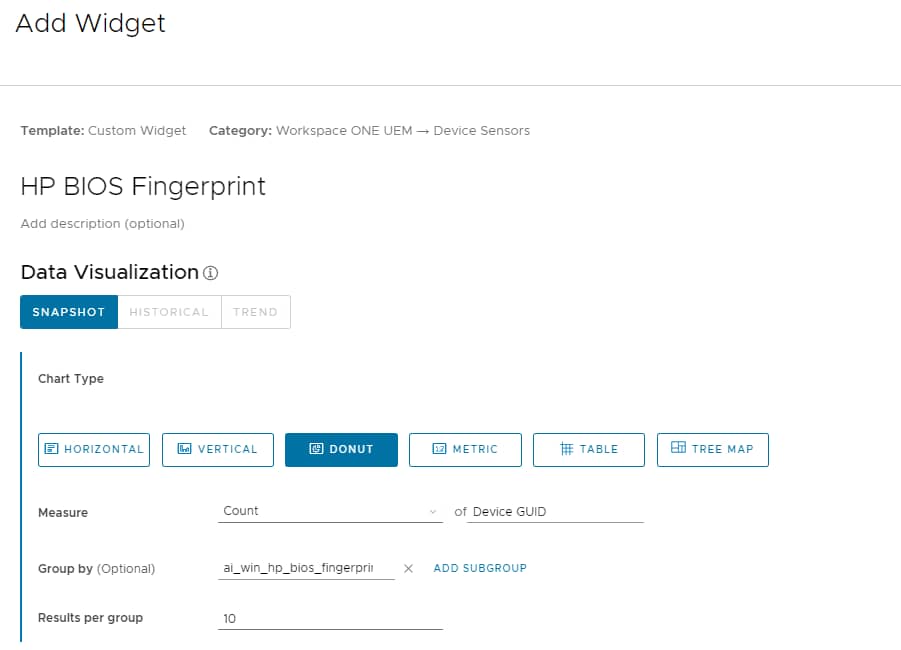
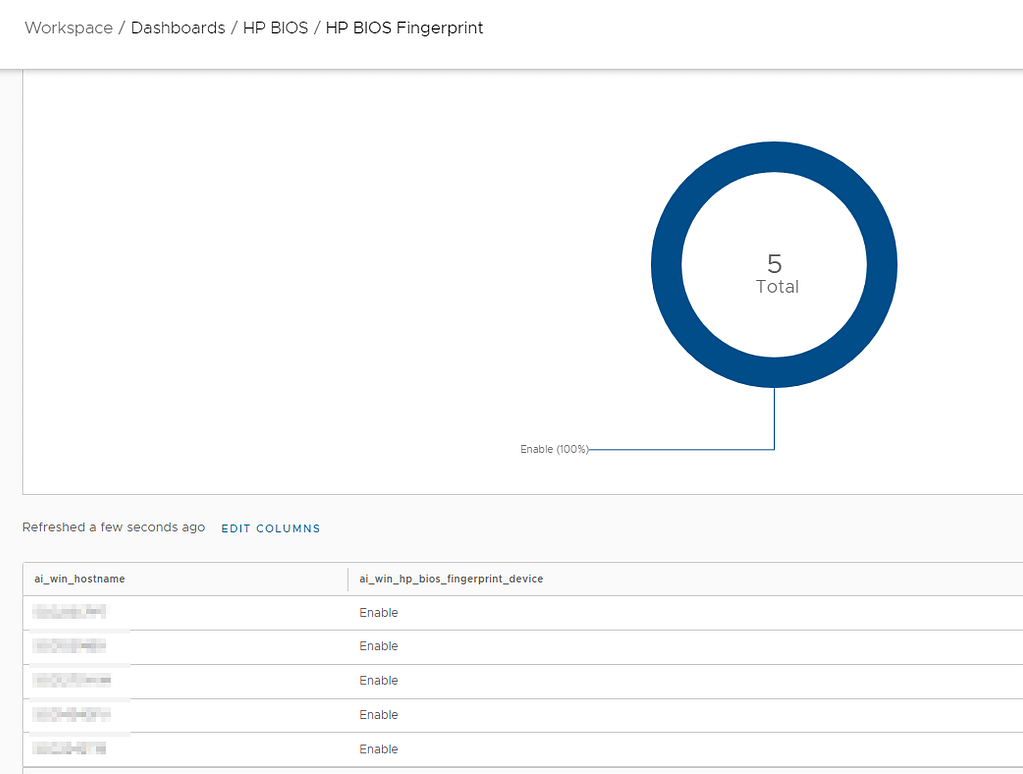
Lastly, you can use the sensor data to build some nice dashboards and reports to keep track of your BIOS configuration as shown below. Just add your sensor in the “Group By” section as shown below:
