Introduction
Over the past decade or so, I’ve been using things like Apple DEP, Android Zero Touch, Autopilot,… extensively. I’ve even created my own Windows onboarding flow :-). As always, a smooth onboarding flow is key to success of any UEM project!
Now that Omnissa launched Windows Server management in beta, I asked myself the question: “What’s the minimal amount of effort required to get a Windows Server managed by Workspace ONE?”
The answer turns out to be 1.
One command (terraform apply) is all it takes to spin up a server, get it enrolled in UEM, install apps, profiles, execute scripts and have it join my domain.
The main ingredients I’ve used for this recipe are: Google Cloud, Terraform and obviously Workspace ONE UEM. Setting this up by following this tutorial should be possible in under 20 minutes.
Before I walk you through the entire process, please read the following disclaimer:
This is my idea of having some fun over an otherwise boring weekend. I never used Terraform before and have nearly no experience with GCP. I also did not worry about security, as these servers are being destroyed again almost immediately. I am not aware of best practices in GCP and Terraform and none of this has been validated by Omnissa. Also note that Windows Server is still in beta. Things might change before server management is GA’d.
Use this tutorial at your own risk, or don’t use it at all 🙂
Getting started
Source files
You can find all the files that are involved on my Github repo here.
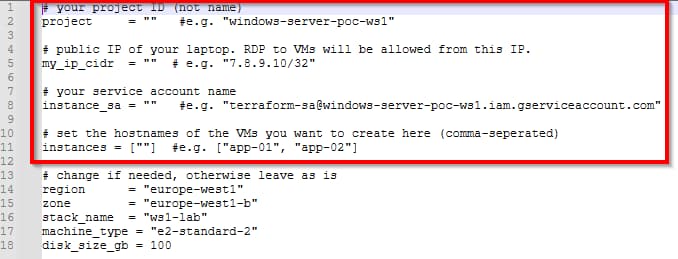
Only terraform.tfvars needs your input, so open it in a text editor.
On your local machine, create a project folder and extract the files there. This should result in the following structure:

Note: credentials.json is not included in the zip. You will create it in the next section!
Google Cloud initial setup
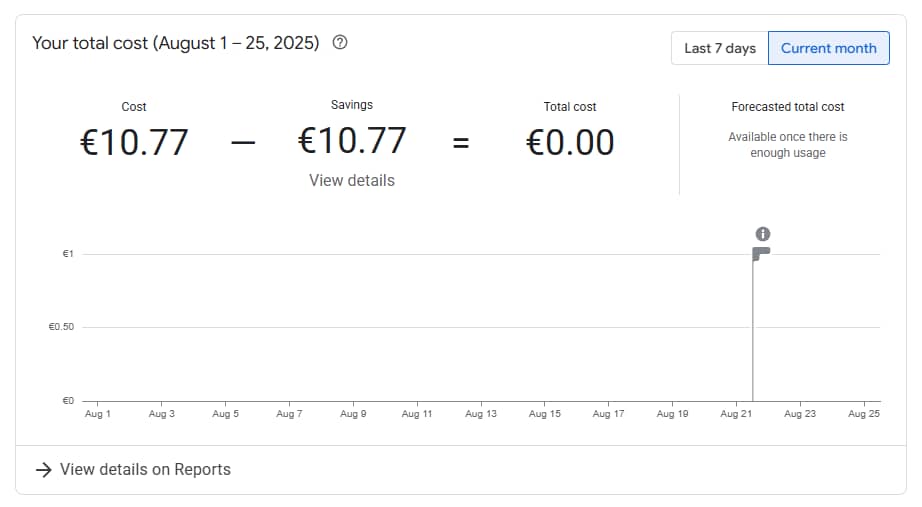
I started a new Google Cloud trial, which gives you 300 dollars of credit to spend. However, I quickly learned that does not involve Windows server 2022 VMs, so I had to switch to a paid subscription. Luckily, you can keep your credits, but it does require a credit card…
In full disclosure, this is my bill at the end of a weekend non-stop spinning up and destroying resources:
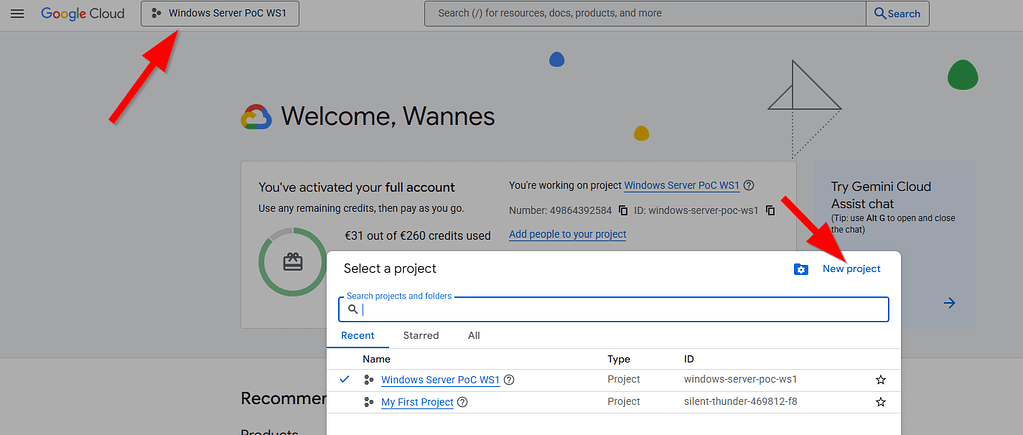
Once you’ve gained access to your GCP console, start with creating a new project.
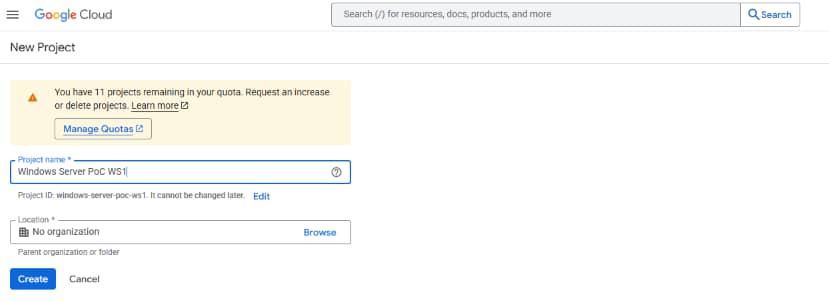
Enter a name for the project:
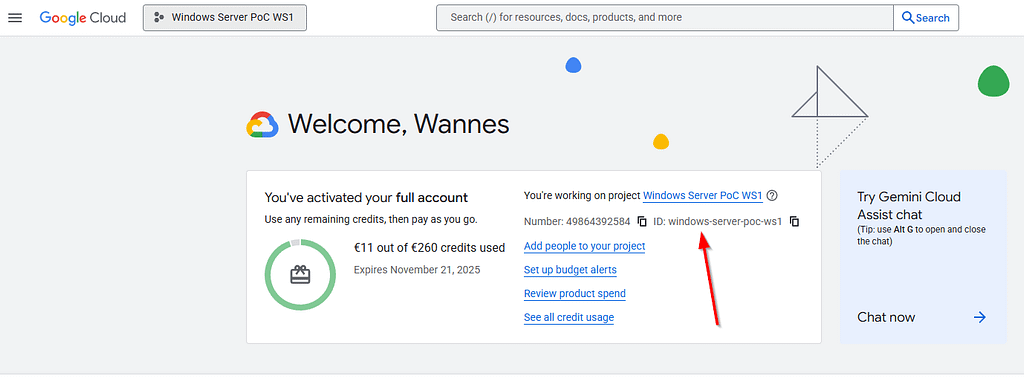
Copy the project ID and paste it in the terraforms.tfvars file (line #2):
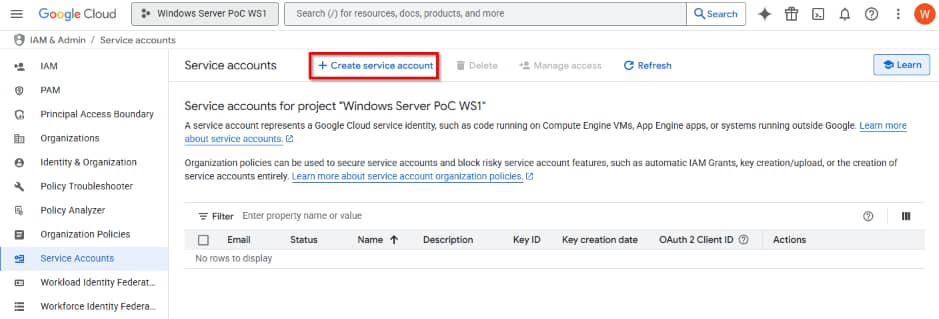
Next, we’ll need a service account with permissions to create VMs, read our secrets stored in Google Secret Manager,… Open the IAM & Admin -> Service account tab and click create new service account:
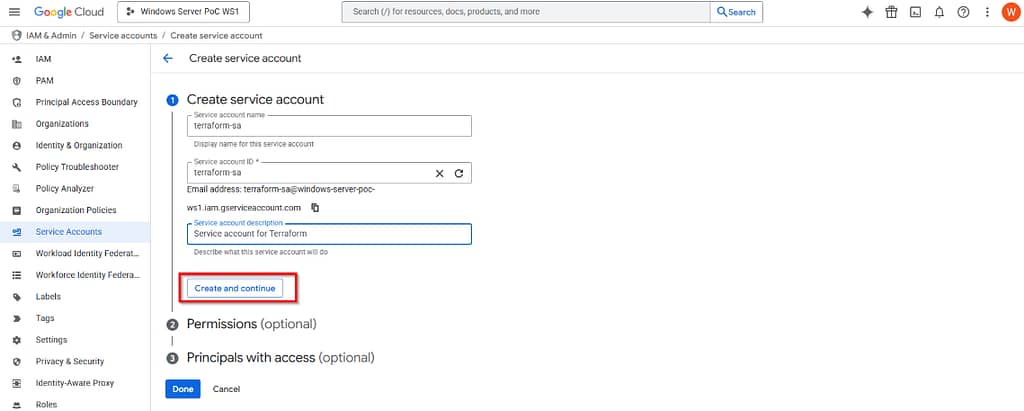
Give it a name and description:
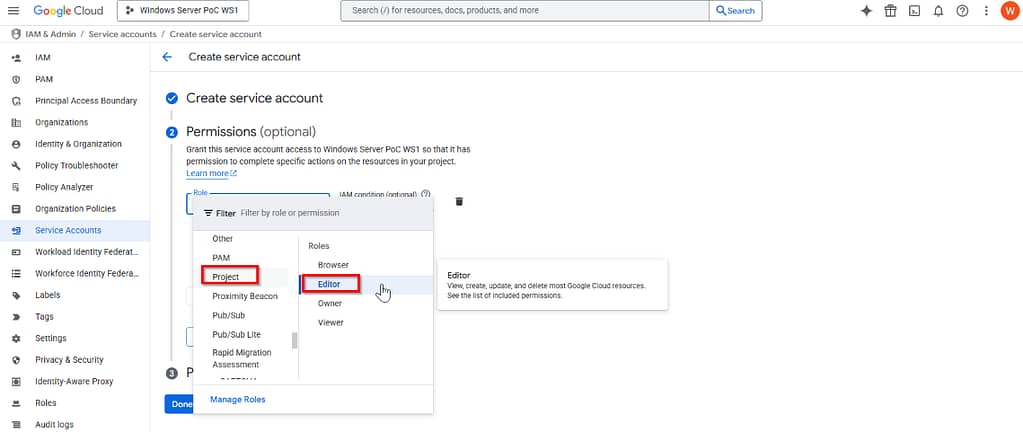
and provide it with these permissions: Project: Editor and Secret Manager: Secret Manager Secret Accessor:
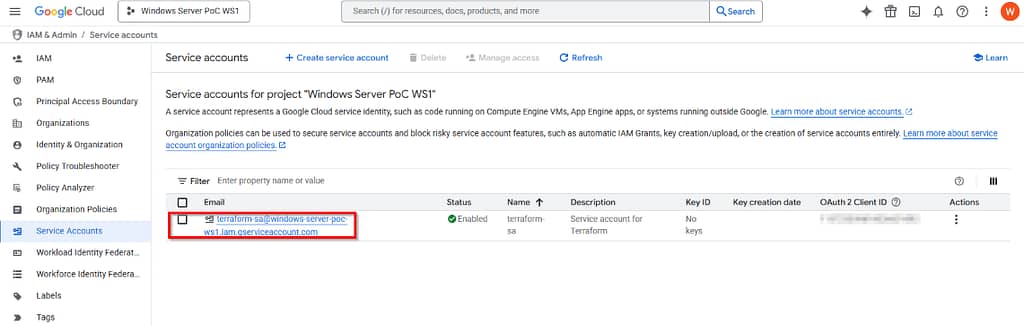
once you created the service account, open it again and copy the email.
Paste this email in the terraform.tfvars file (line #8)
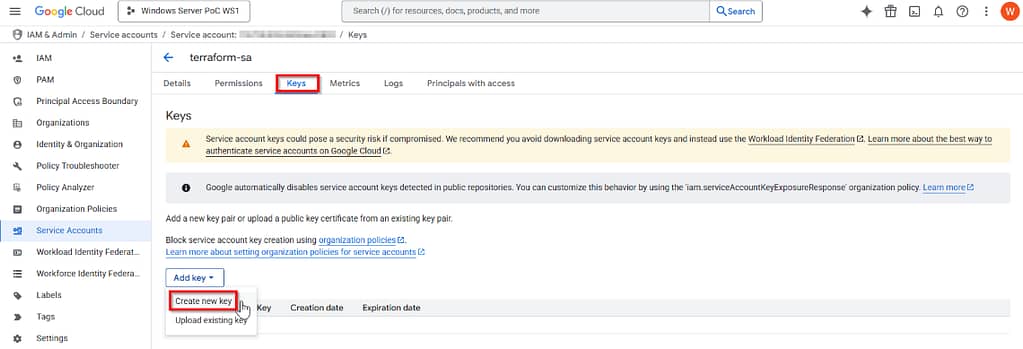
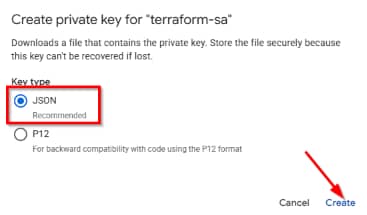
navigate to the Keys tab to download the credentials json file:
Rename the file to credentials.json and store it in your projects local folder.
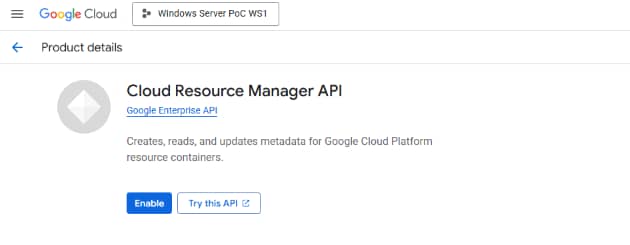
Next, navigate to API & Services, search for Cloud Resource Manager API and select Enable:
Lastly, we’ll set up the secrets in Google Cloud secret manager. Copy the commands below and edit with your Workspace ONE environment information:
# WS1 UEM Device Services URL (format = https://dsXXX.awmdm.com)
gcloud secrets create ws1_server_url --replication-policy="automatic"
gcloud secrets versions add ws1_server_url --data-file=<(echo "<put your DS URL here>")

# WS1 UEM Organization Group ID where servers should enroll
gcloud secrets create ws1_group_id --replication-policy="automatic"
gcloud secrets versions add ws1_group_id --data-file=<(echo "<put your OG ID here>")

# enrollment account username
gcloud secrets create ws1_enroll_username --replication-policy="automatic"
gcloud secrets versions add ws1_enroll_username --data-file=<(echo "<put your enrollment account here>")

# enrollment account password
gcloud secrets create ws1_enroll_password --replication-policy="automatic"
gcloud secrets versions add ws1_enroll_password --data-file=<(echo "<put your enrollment password here>")
In Google Cloud, open Cloud Shell and paste the commands. That’s all for the GCP side.

Terraform initial setup
With the GCP side configured, we can now download the Terraform binaries from https://developer.hashicorp.com/terraform/downloads
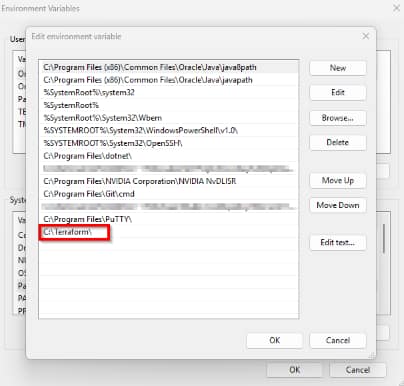
Extract the terraform.exe to a folder such as C:\Terraform. Next, add the path to the environment variables of your system (so you can simply type terraform in powershell)
Test if it works after a reboot: open PowerShell → terraform -version.

Edit Terraform.tfvars file and deploy your first servers
Open the terraform.tfvars in your favorite text editor and enter the values obtained in the previous steps.
The instances variable holds the comma-separated list of hostnames that you want to create with Terraform.
You should now be ready to deploy your first VMs and see them automatically enroll in WS1.
But first, let’s have a closer look at the entire flow.
The enrollment flow in a bit more detail
When you enter the command terraform apply, a couple of things start happening automatically. Let me try to break it down a bit:

- Terraform talks to Google Cloud and provisions your VM(s). Each machine defined in the terraform.tfvars instances variable is created inside a VPC/subnet and receives both an internal and a public IP (RDP is allowed only from your own IP.)
- Metadata is injected into the VM. This metadata tells the Google guest agent to download and run a PowerShell script (ws1-deferred-enrollment.ps1) from a storage bucket.
- That script runs right after boot. It fetches secrets (server URL, OG ID, enrollment credentials) from Google Secret Manager, downloads the Workspace ONE Intelligent Hub MSI directly from your tenant, and installs it in deferred mode.
- A bootstrap account is created temporarily, together with a scheduled task and one-time autologon. This is how we trick Windows Server into performing an “interactive” logon without you touching anything.
- At the first autologon, the scheduled task kicks in. It runs the Hub’s enrollment command with the right parameters. The device now checks in with Workspace ONE UEM and gets registered as a managed Windows Server. (Note: I’m not using the -ASSIGNTOLOGGEDINUSER flag in my enrollment command. That’s because UEM doesn’t know the bootstrap user used in my script. So trying to reassign the device at this point would fail anyway. Instead, I’m using a domain join script in step 8. So when Freestyle is ready and reboots the device, the server can be reassigned to the first domain user that logs in to the machine)
- Cleanup happens right away. The bootstrap user is disabled, autologon registry keys are removed, and the scheduled task deletes itself. The server is left in a clean state, enrolled and managed.
- From here on, a Freestyle workflow takes over. Apps, profiles, sensors, domain join scripts and a final reboot… all the resources you defined in WS1 are now being pushed down automatically. Here’s my extremely basic workflow I used during this PoC:
Deploying your machines
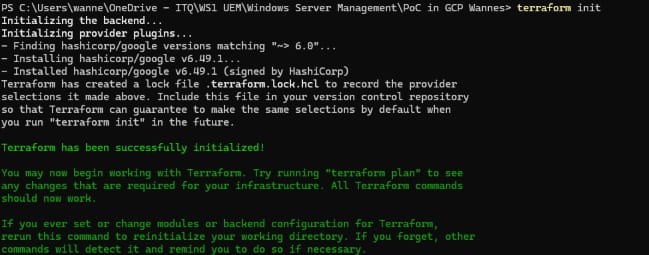
Open Powershell and go to the folder containing main.tf. Run the following command:
terraform initThis will initiate all the modules required to talk to Google Cloud.
Next, enter following commands:
terraform plan
terraform apply
If no errors are shown, you have to confirm by typing yes. A couple of minutes later, your VMs will show up in Workspace ONE UEM where they can start processing their assigned resources.
for my convenience, the output will show the public IP of the VMs you just created, so you can easily set up an RDP session.
Cleanup
If everything worked, we can destroy everything again to save some (free) money:
terraform destroy
If you just want to destroy one or more VMs, you can simply remove them from the terraform.tfvars file and enter terraform apply again. This will leave all other resources in GCP intact.
Conclusion
I used Google Cloud for this blog, but the same can be achieved on vSphere and other hyperscalers.
Anyway, I had a lot of fun building this flow. Terraform is cool!