Introduction
Last year, I wrote another blog on how to integrate ServiceNow with Active Directory and an IdP. And nearly two years ago, I wrote another ServiceNow blog covering the configuration of the Service Graph Connector to populate the ServiceNow CMDB with device details from Workspace ONE UEM, and use Freestyle in Intelligence combined with sensors to populate additional attributes not synced by the Graph Connector.
But there’s more options to explore! The Omnissa team has been working on an ITSM connector for a couple of years already. I’ve never had the time to give it a try myself. Until now that is, and it’s definitely delivering what it’s promising!
This quick blog post will only cover the initial configuration of the ITSM connector. Although I was able to configure it myself in no time using the available documentation, I thought adding some screenshots might be useful to some. I’ll also describe the little bumps on the road, of which I know Omnissa is working on to get them resolved.
If you want to the ITSM connector in action, I encourage you to have a look at this demo: https://techzone.omnissa.com/?share=video6134&title=workspace-one-itsm-connector-for-servicenow-demo
This blog post will guide you through these main tasks:
- Install and configure the ITSM connector in Snow
- Configure the ITSM workflow connector in Workspace ONE Intelligence
Note: I started configuring the ITSM connector with following items in place:
- ServiceNow tenant (Xanadu release)
- Workspace ONE UEM 24.06
- ITSM connector v7.0.0
- Service Graph connector for Workspace ONE configured in ServiceNow (see this blog)
- ServiceNow integrated with AD using a MID server (see this blog)
Install and configure the ITSM connector in Snow
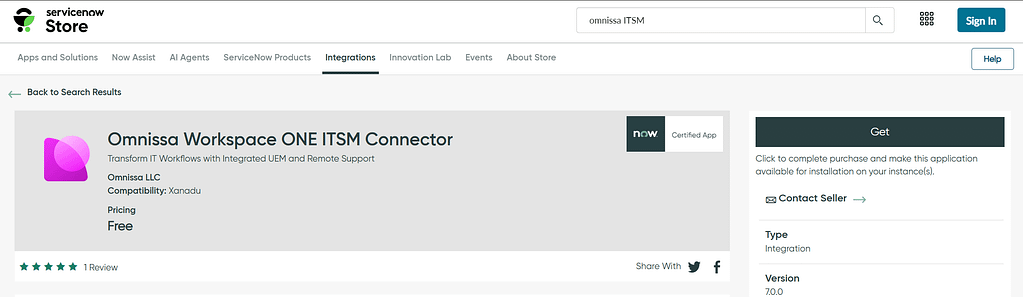
Our first task is to head over to the ServiceNow Store and search for the Omnissa ITSM connector. Log in and press the Get button to make it available to your instance:
Note: If you’re using a ServiceNow developer instance, you’ll immediately bump into a showstopper. you can’t install Store apps to these developer instances
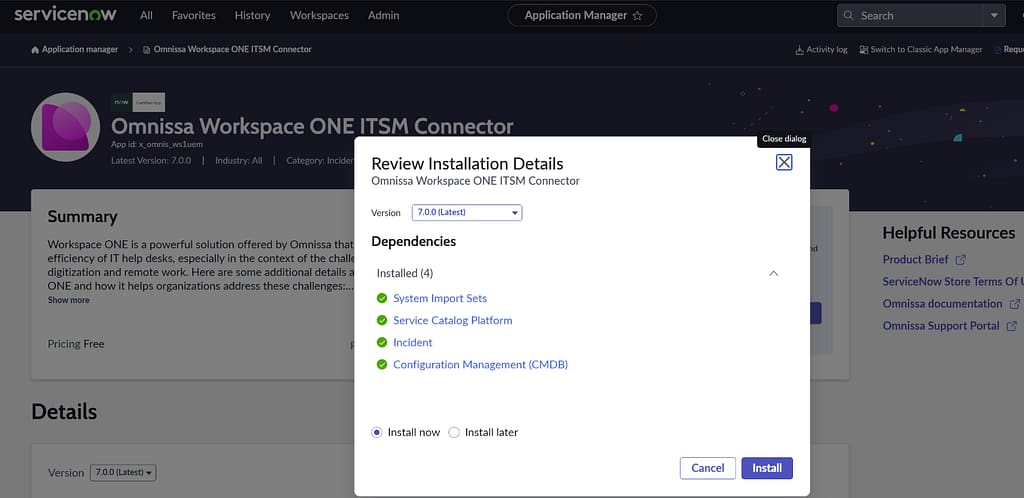
Once you’ve completed the ITSM Connector purchase (free of charge) in the ServiceNow Store, you can install it in your tenant by navigating to the Plugins section:
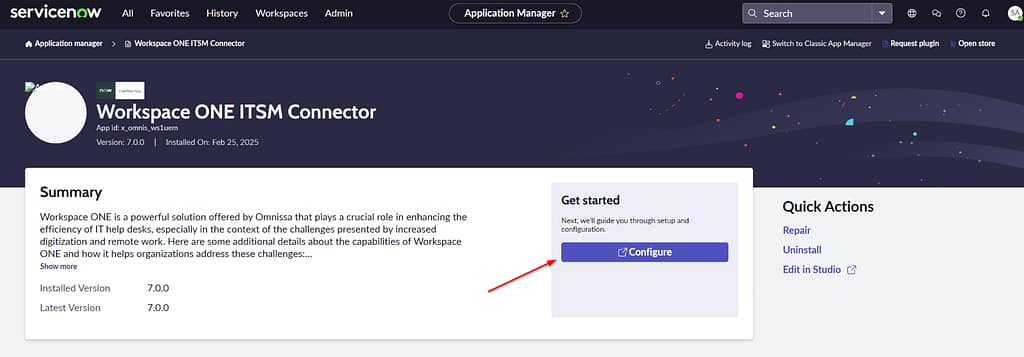
Once the installation completes, we can start it’s configuration:
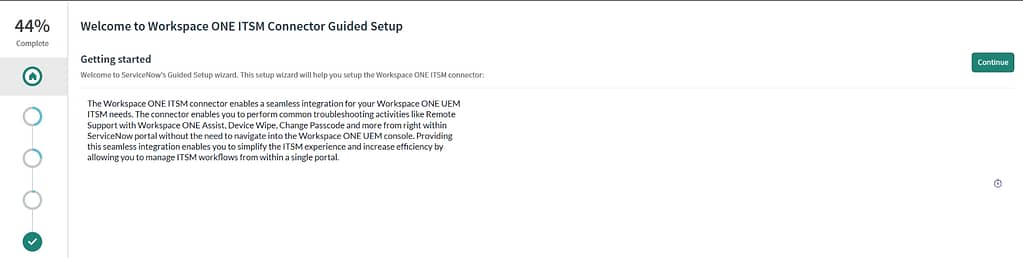
The ITSM connector Guided Setup screen opens. (Notice that in my case it’s already showing 44% completion, this is a known problem and should be addressed somewhere in the near future).
The first step is all about configuring authentication on the three platforms involved (UEM, Intelligence and Snow). As I’m using Workspace ONE UEM SaaS, I’m using the Oauth option:
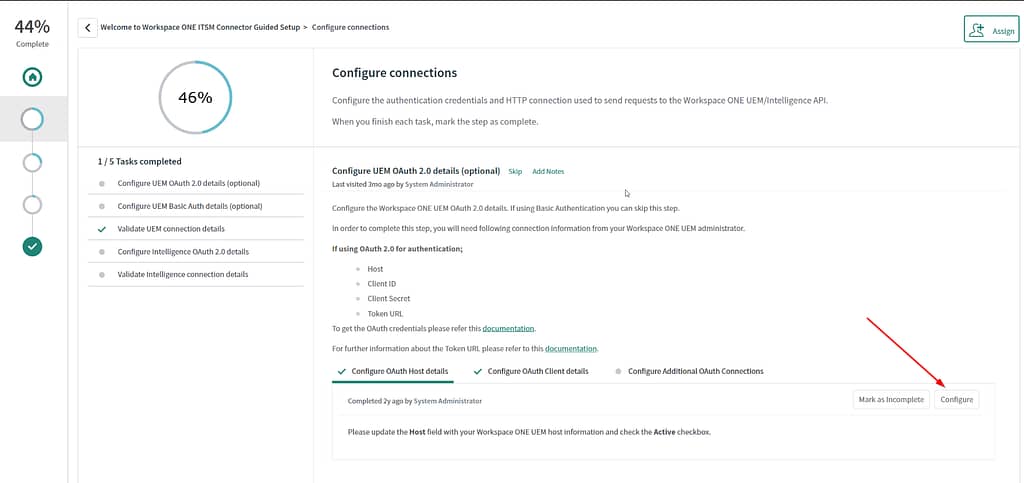
Provide your Workspace ONE API URL. You can find it in the Workspace ONE UEM admin console > Groups & Settings > All Settings > System > Advanced > Site URLS.
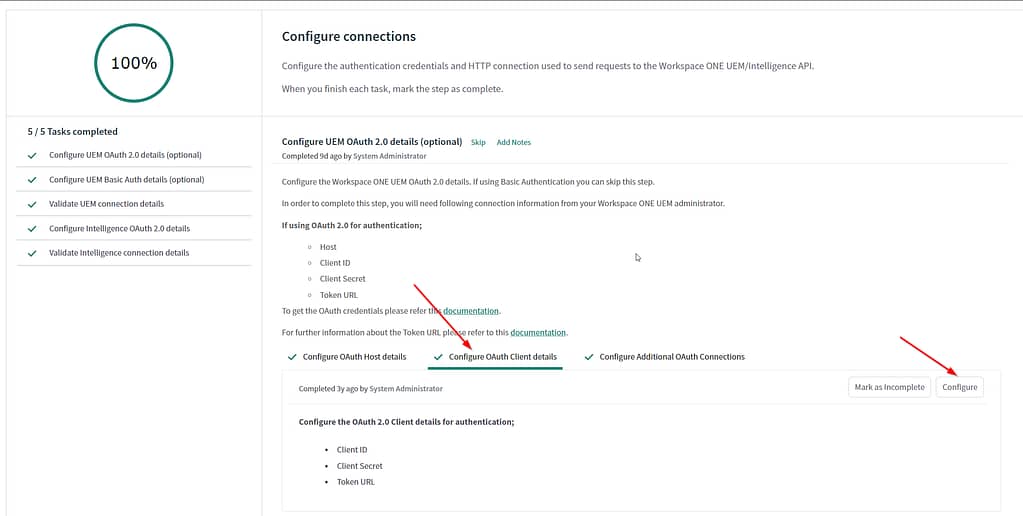
Next, we’ll be configuring the Oauth Client Details section:
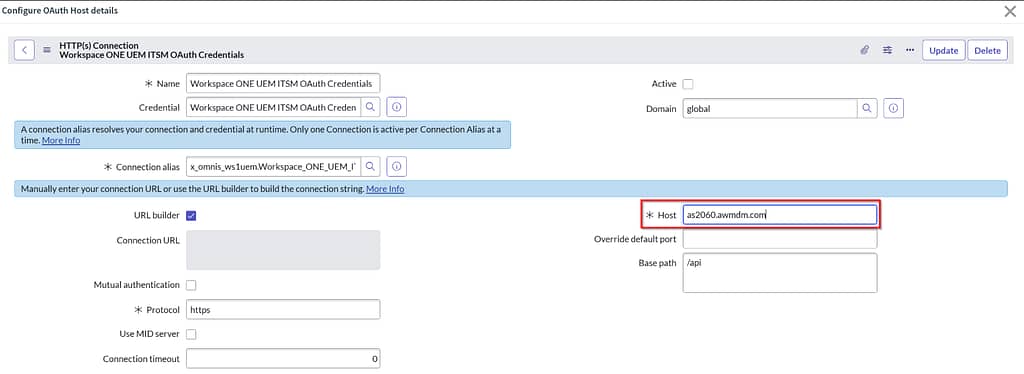
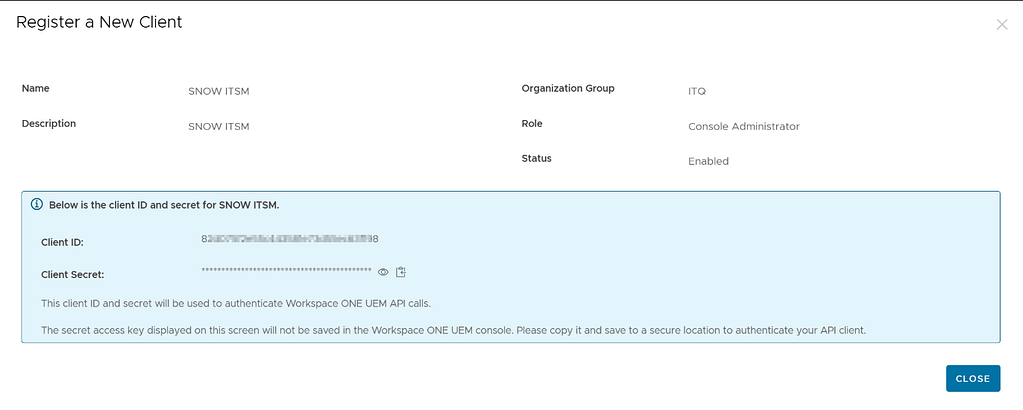
Before being able to continue with the Connector configuration, we’ll need to switch to the UEM console to create Oauth credentials. Navigate to Groups & Settings > Configurations > Oauth Client Management and click Add:
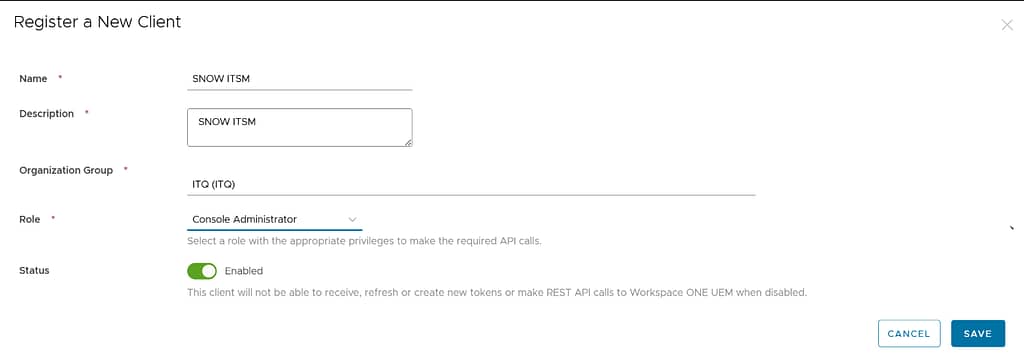
take note of the client ID and secret:
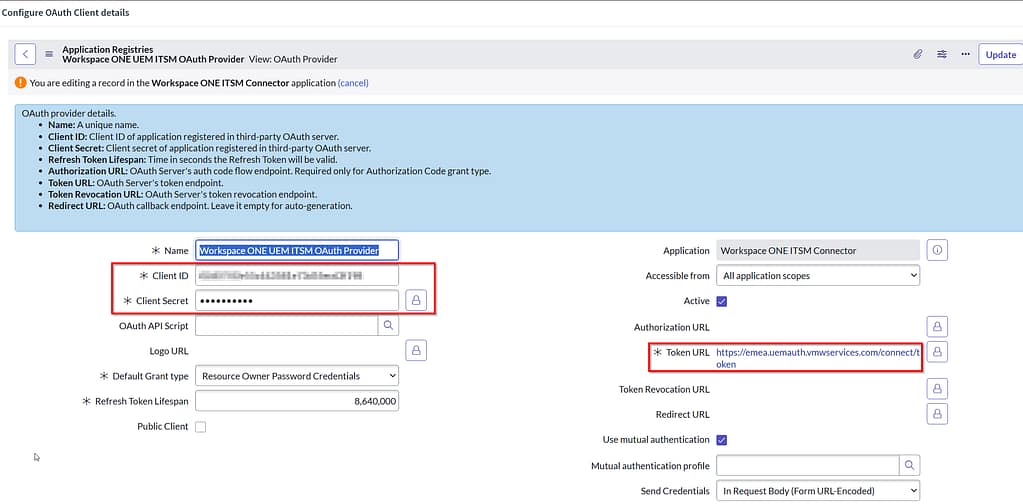
Head back to the ServiceNow console and paste your credentials. Next, provide the proper Token URL for your Workspace ONE UEM region. Here’s the list of options to choose from
As I only have one Workspace ONE UEM environment, I will skip the “Configure Additional Oauth Credentials” task. But maybe worth mentioning you can integrate up to 5 UEM tenants!
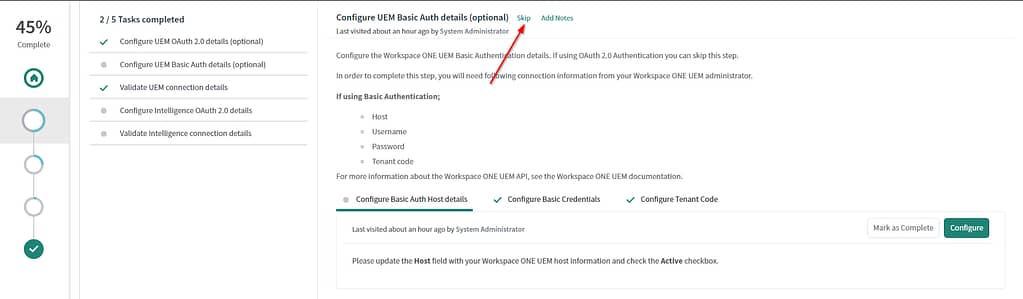
We’re using Oauth, so we can skip the configuration using basic authentication.
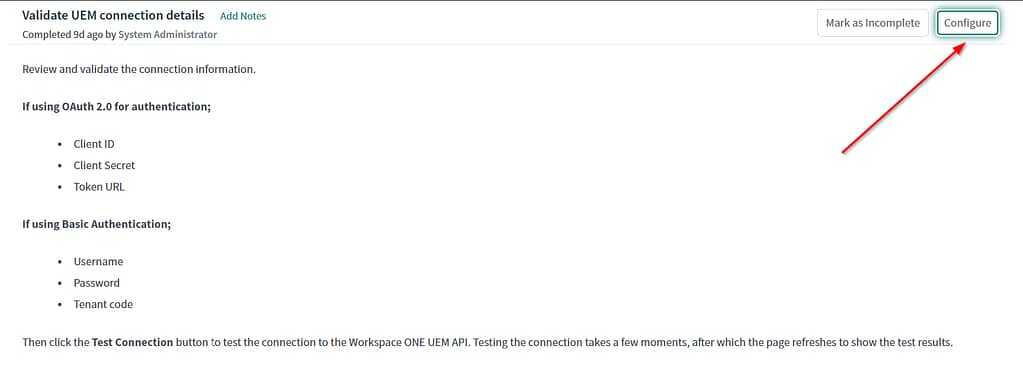
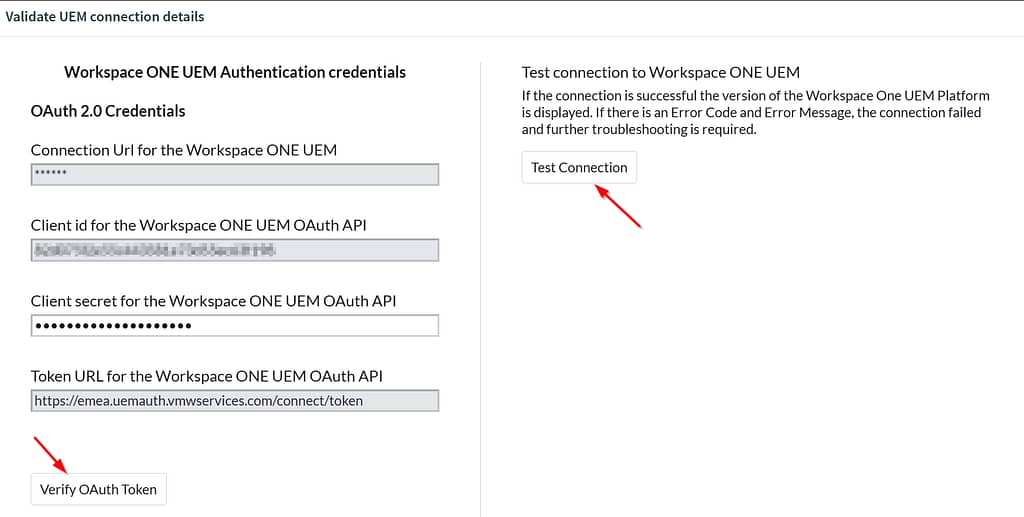
Next step is to validate the connection to UEM:
Note: In my case, the Validate UEM Connection details screen defaulted to using basic auth, so I was unable to test the OAuth credentials. After reviewing the Basic Auth Host Details configuration screen, I noticed it was enabled out of the box. Omnissa is aware of this problem and will fix it in the near future.
Unselect this Active checkbox:

You should now be able to request a token and test the connection as expected:
This completes the integration of the ITSM connector with Workspace ONE UEM. Next up is Intelligence.
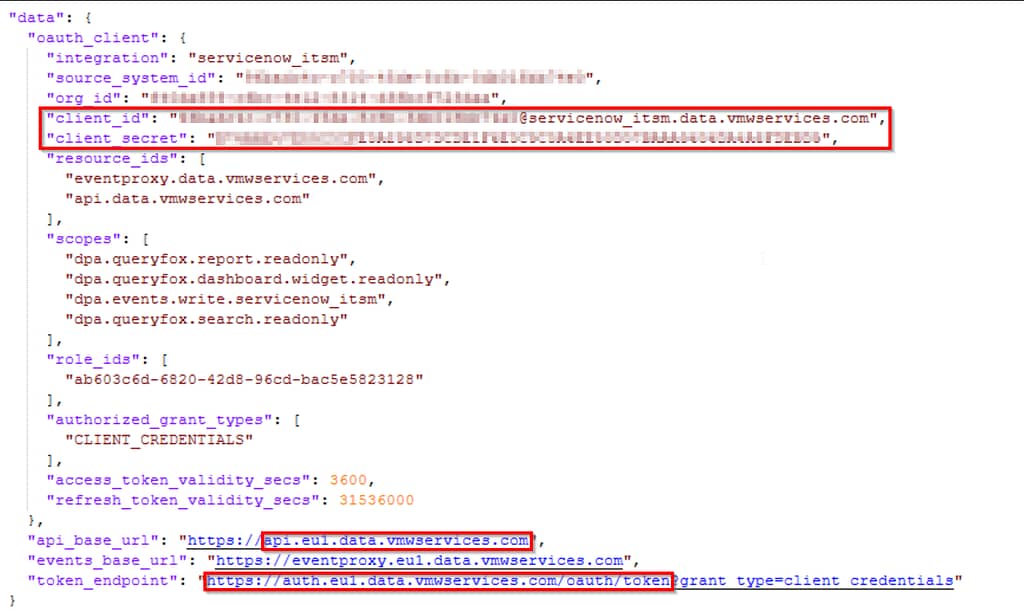
First, we’ll need to head to our Intelligence portal > Integrations > Data Sources and select Set Up on the ITSM Connector. Click Next until you can download the credentials.

Open the json file in a text editor and copy the values for the following attributes:
- api_base_url (omit https://)
- Client_id
- Client_secret
- Token_endpoint (omit everything starting from the ?)
Head back to the ServiceNow guided setup and click configure on the intelligence Oauth Host details tab:
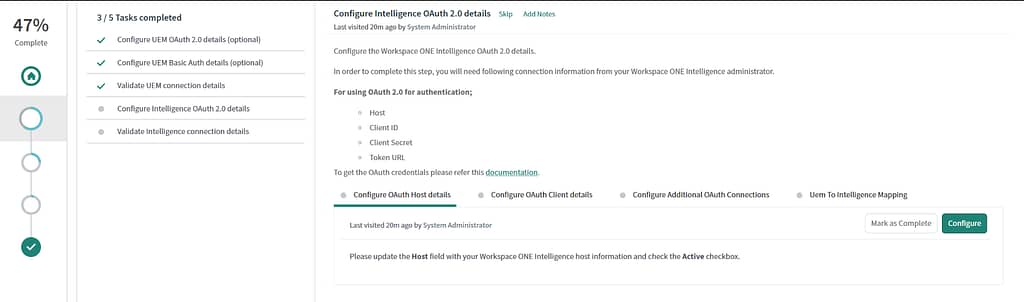
Paste the api_base_url value (omitting https://) and click Update:

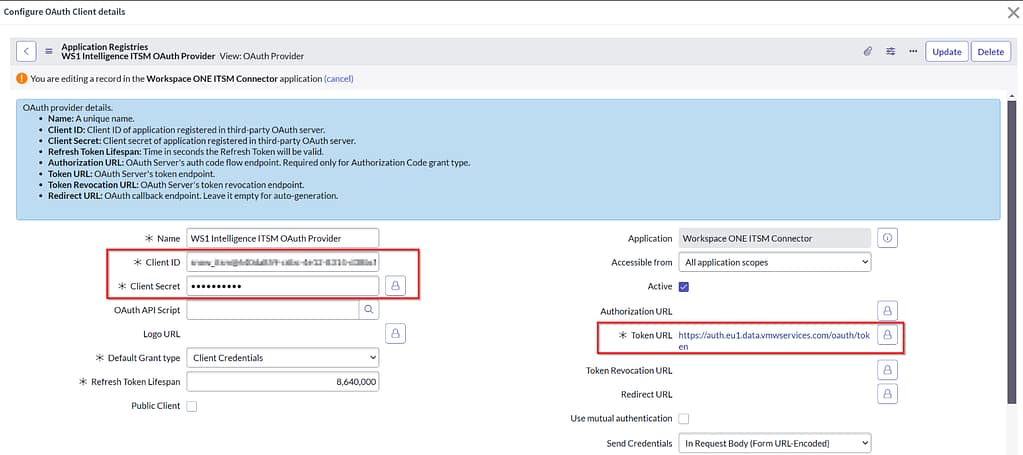
Next, move on to the Configure OAuth Client details tab:
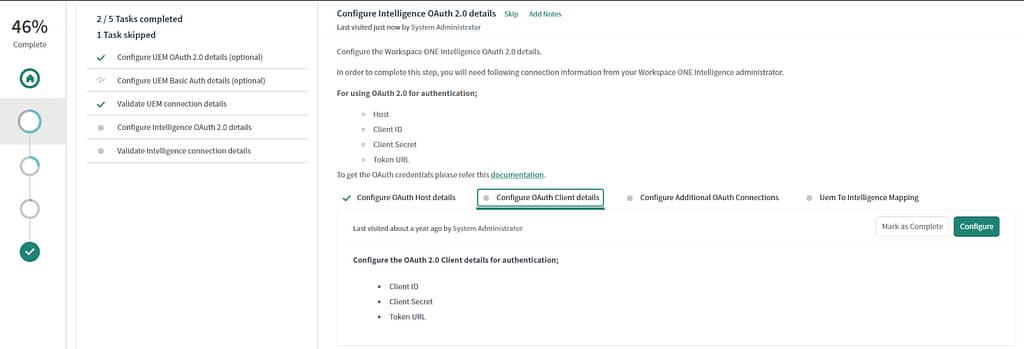
Provide the details for client ID, client Secret and token URL. Click Update:
I only have one Workspace ONE (UEM + Intelligence) environment, so I’m skipping the “Configure Additional Oauth Connections” and UEM to Intelligence Mapping” tasks.
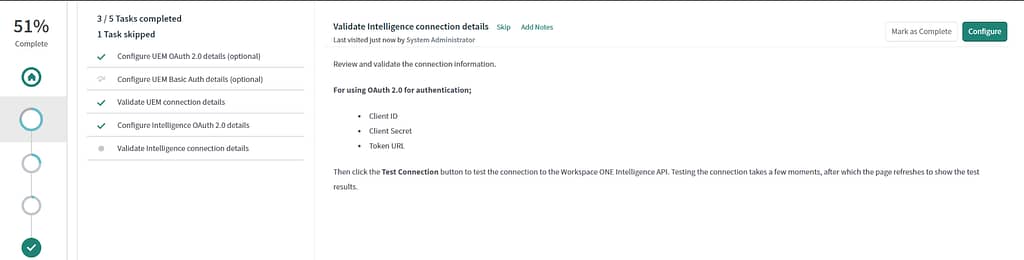
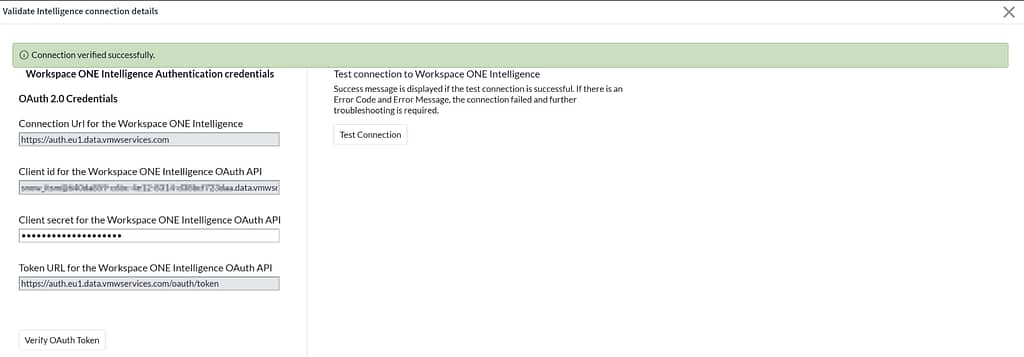
Next, we can test our OAuth configuration:
With authentication configured, we can now assign the proper privileges to our ServiceNow support agents.

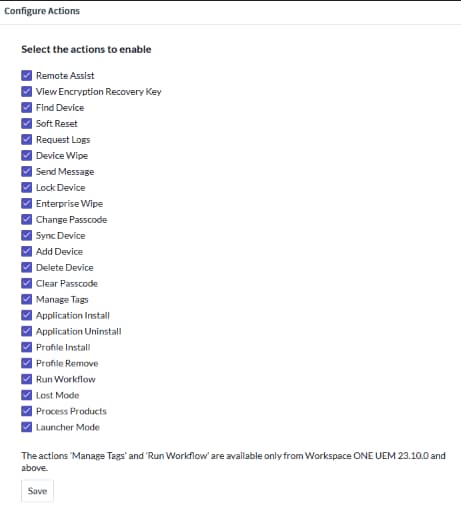
Click Configure on the Configure Actions tab:

Select the actions you want your support team to be able to execute. This will create the Roles in Snow that we can then assign to our users.
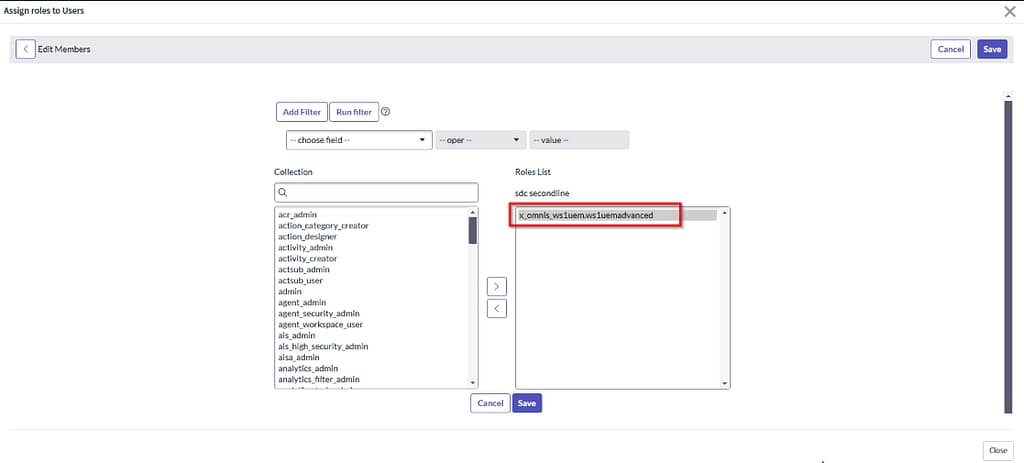
Next, we can assign roles to users/groups:
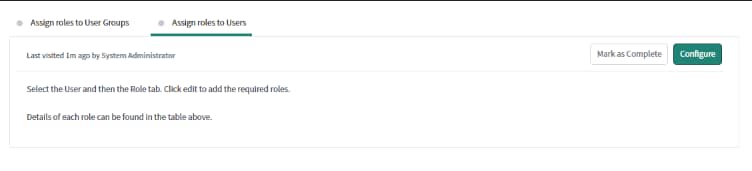
You can either assign the WS1UEMStandard or WS1UEMAdvanced role:
The Omnissa docs page provides a clear overview of which actions are available in each of the roles
As most of the options provided by the ServiceNow self-service catalog are already available in the Workspace ONE Access self-service portal (locate device, view recovery key,…) or via the Intelligent Hub (install profile /0 app,…), I decided to not enable this feature and to press Skip on the screen shown below.

The last section of this initial setup procedure asks us to configure some additional settings.
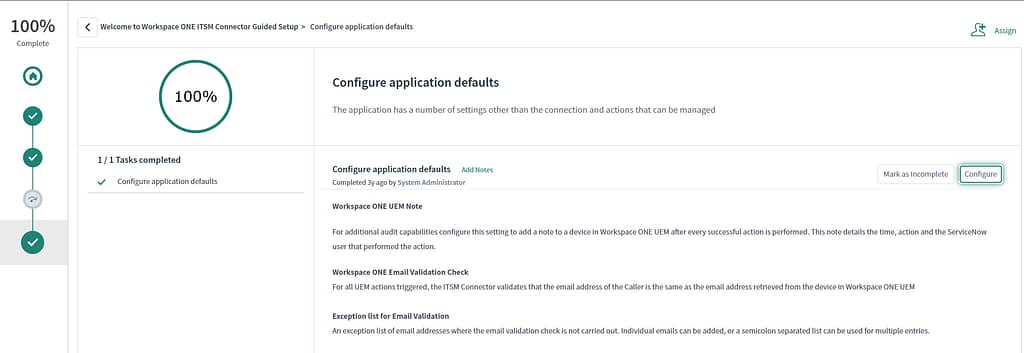
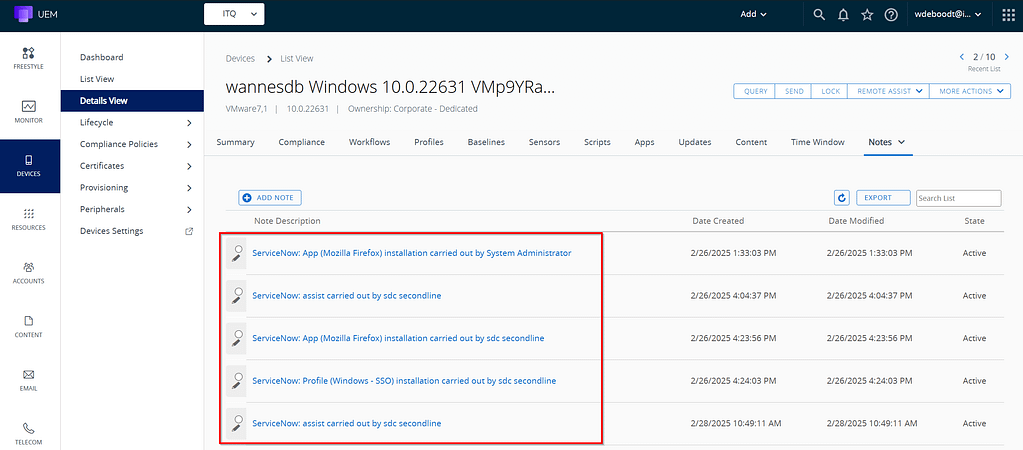
I opted to enable the Workspace ONE UEM Note option.
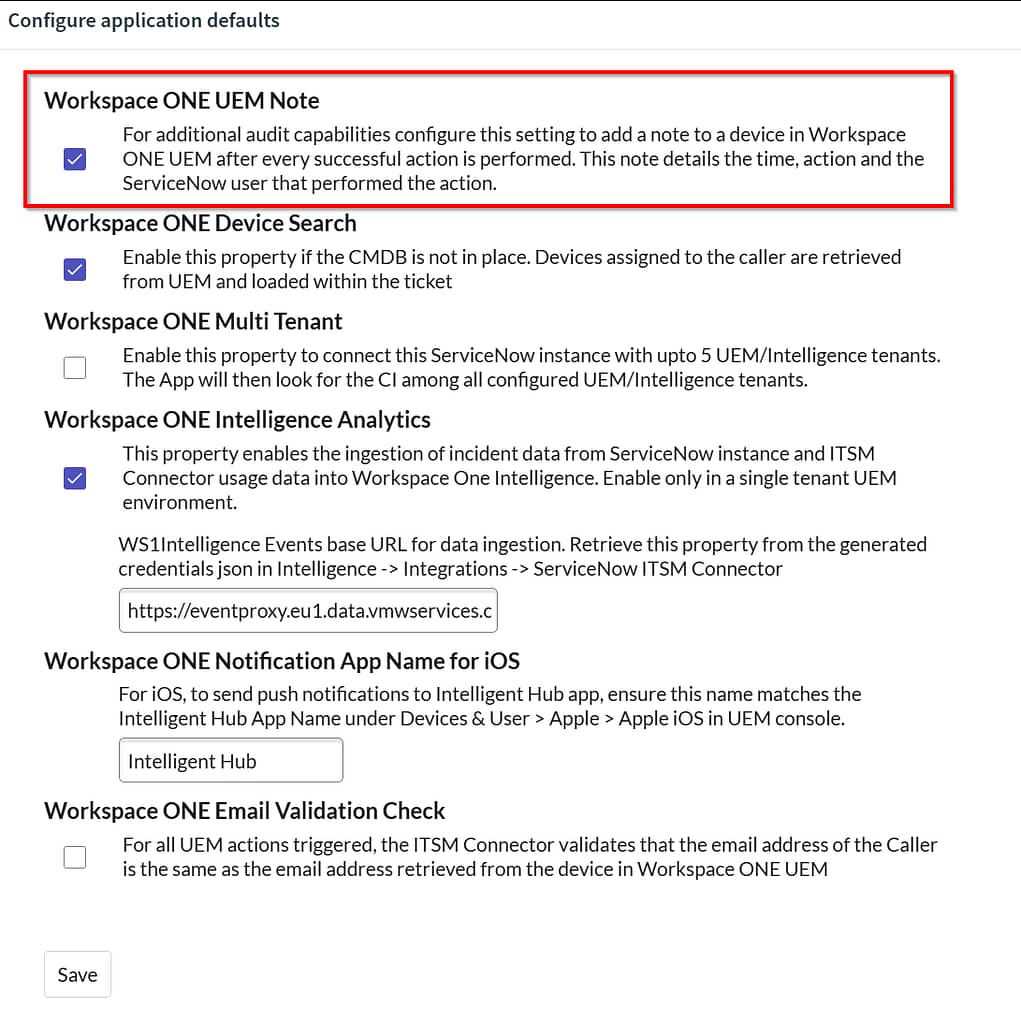
Any action taken on the device using the ITSM connector is logged in the ServiceNow incident, as well as in the UEM device details page > Notes tab. the note describes the action, the actor and other typical info like timestamps:
Note: I also encourage you to have a look at the Workspace One Intelligence Analytics option. This option allows ServiceNow to send data to Workspace ONE Intelligence, which can be used to create nice dashboards / reports. Have a look at Patrick’s blog for the configuration!
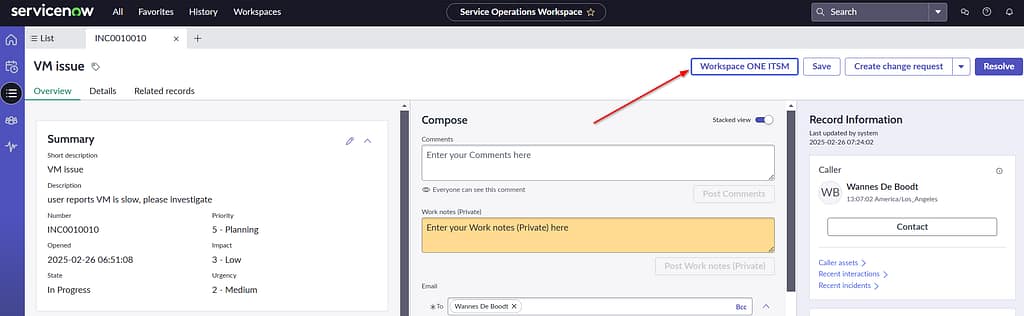
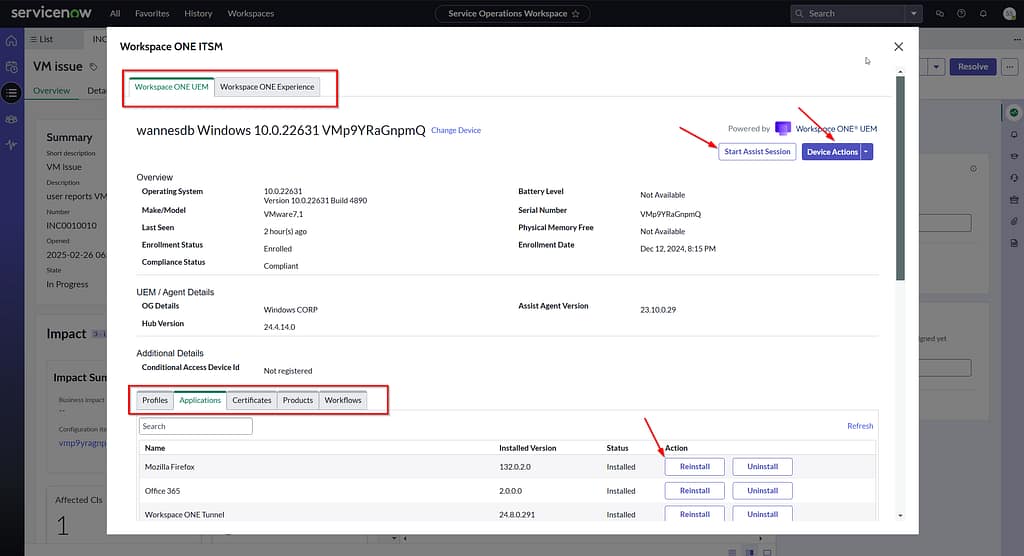
With everything in place now, you should now be able to start using all of its features:
Configure the ITSM workflow connector in Workspace ONE Intelligence
There’s one additional thing we can do, and that’s the configuration of an Intelligence workflow connector that allows us to create ServiceNow Incidents or Tickets from an Intelligence automation flow (It also unlocks the ability to use app approval flows, not covered in this blog).
The configuration is quick and painless. Open the Intelligence portal and head over to Integrations > Workflow Connectors > ServiceNow and click setup. Here’s an example configuration (in a production environment I would always use OAuth):
As you can see, we can now create ServiceNow incidents automatically based on events reported to Workspace ONE Intelligence:

Conclusion
The setup of the Workspace ONE ITSM connector for ServiceNow is definitely not rocket science and I can see how this can help speeding up time to resolution of incidents reported by your end users. You also no longer need to worry about providing training or access to the UEM admin console your helpdesk staff.
nice blog
hi
Hello 🙂
Does the integration provide auditing capabilities to track actions performed via the ITSM Connector for compliance and monitoring purposes?
Yes, both on Snow and UEM side, you can enable audit logs. for UEM audit logs, enable the following setting:
