Introduction
Workspace ONE offers a wide range of onboarding methods for Windows devices. For example Autopilot, Drop Ship Provisioning (online and offline), command line staging and user-driven BYOD enrollment… For most situations, these onboarding flavors got you covered. But from time to time, you might face certain customer requirements or technical limitations that require these onboarding to be tweaked a little.
The past few months I’ve been working on such a challenging project. Our use case resembled a lot to the one described in Grischa Ernst’s blog: Drop Ship Provisioning Offline with Active Directory domain join from anywhere in the world.
We started out with the PowerShell Splashscreen developed by Grischa, but certain security requirements and UX expectations forced us to come up with another solution.
Solution
So I’ve built a basic .NET application from scratch to cover our needs. We’ll zoom in later on certain things, but from a high level perspective, it does the following things:
- Temporarily lets the device run in single app mode. All other parts of the OS are inaccessible to anyone during the onboarding process; thus ensuring the device is properly secured with all applications, profiles and policies:
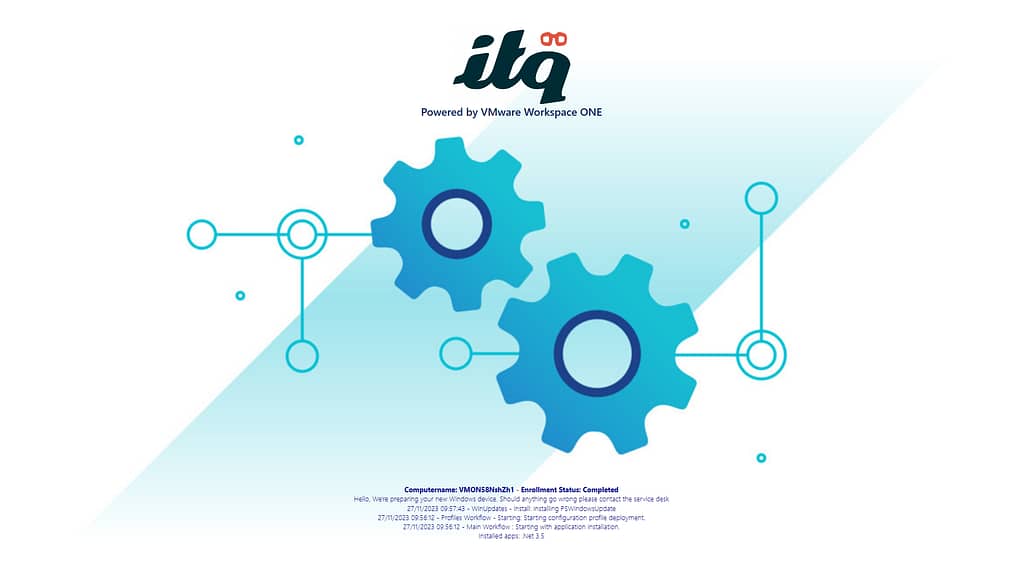
- Dynamically displays information on screen, including:
- Hostname
- Workspace ONE enrollment status
- Last line of up to four log files, generated by for example scripts in Freestyle Orchestrator
- Installed applications as soon as they have been successfully installed
- Has some branding options , like a customer logo, color scheme, background image,…
- Can clearly indicate if certain errors occur during the process.
Here’s how it looks like in action using its default settings:

Here’s a screen recording of the entire process from PPKG installation to end user logon screen.
04:20 PPKG installation complete. Sysprepping + reboot
12:00 Auto-Logon complete and Custom Onboarding App launches
12:35 Enrollment In progress
13:00 Enrollment Completed
13:25 Workflows starting
31:05 Onboarding Completed. Rebooting.
31:55 User logon screen available.
How it works
Shell Launcher v2
Let’s zoom in a bit on How the app works:
The app itself is just a basic full screen UI that dynamically shows the information described earlier. It’s a .NET Framework WPF app, so it’s written in C# and XAML. The MSI exported from Visual Studio is added to a PowerShell Application Deployment Toolkit (PSADT) package, which makes it easy to use some pre- and post-installation commands.
To secure the device during the onboarding process, the pre-install commands activate a custom Windows feature called Shell Launcher V2. In short, this replaces the default Windows UI (explorer.exe) with the app of your choosing (this Onboarding app), preventing anyone from making any modifications whilst allowing all app and services to run normally in the background.
Note that the use of this feature requires an Enterprise edition of Windows 10 or 11. During the pre-install commands of the PSADT package, a generic KMS key is applied to the computer, as it turned out both Dell and HP only support a Professional Edition in their staging facilities.

Next to that, in case someone would succeed in killing the Onboarding app, it is launched again immediately. If some other app would launch in the background and try to come to the front, the onboarding app takes focus again immediately.
Log Files
As mentioned earlier, the app can trace up to four logfiles and shows the last line of each of these files on screen.
Why four log files you may ask? That’s because in our situation, we released 4 workflows in parallel on the machines to speed up the process (Note that this only makes sense under specific circumstances, like when the device is executing scripts that can take a while before they complete!)
All of the scripts I write, start with the same logic that defines a log file and make use of a function that appends information to that log file. For example:
#=============================================================
# Parameters
#=============================================================
$logpath = "C:\ProgramData\AirWatch\UnifiedAgent\Logs"
$logfile = "C:\ProgramData\AirWatch\UnifiedAgent\Logs\windowsupdates.log"

#=============================================================
# Create Log Path
#=============================================================
if(-not (Test-Path $logpath)){
	New-Item -ItemType Directory -Path $logpath -Force
}
function Write-Log {
	param($msg)
	"$(Get-Date -Format G) - WinUpdates - Install: $msg" | Out-File -FilePath $logfile -Append -Force
}

#=============================================================
# Install PSWindowsUpdates
#=============================================================
Write-Log "Installing PSWindowsUpdates module"
….
The Onboarding app reads the last line of that log file again every second and shows it on the screen.
You can define your own log path(s) in the app config file included in the SupportFiles folder of the PSADT package.

Installed applications
The customer I’ve been working for creates a registry key for every app they deploy on the device (also using PSADT post-install commands). So I used these registry keys to display the apps on screen as soon as they get successfully installed, by reading the “Name” key value for each of the installed apps under HKLM:\Software\CustomerName.
This is probably a bit too specific for every environment, but if you also uses such a registry hive, you can configure it in the app config file as well:

Error handling
In larger customer environments or in OEM staging facilities, devices aren’t being enrolled one at a time. Think of a staging room with dozens of computers enrolling next to each other. You can’t expect the staging admins to read all these little log lines shown on the screen. So I added some logic to the app that makes it very obvious in case something’s gone wrong during the process.
For example, if the enrollment failed, the value of the registry key HKLM:\SOFTWARE\AirWatch\EnrollmentStatus would be “Failed”. So my app monitors that registry key and reacts by changing the background to something flashy red in case the value would match the string “Failed”.
Next to that, I use the same logic in all of my scripts in case the script has failed. For example:
catch {
	Write-Log "ERRORMSG: " + $_.Exception.Message
	$ErrorMessage = $_.Exception
	$ExitCode = 100
	Add-RegistryCode -ExitCode $ExitCode -ErrorMessage $ErrorMessage
	Exit 100
}
The Onboarding app again modifies the background in case it sees that string “ERRORMSG: ” on the last line of any of the logs.

You can specify your own strings that indicate failure in the app config file:

I’m very well aware that this does not cover all potential issues that may occur during an onboarding flow – think of application or profile installation failures, network issues,… – but it’s a start.
Branding
You can also replace the default ITQ logo with your own, as well as set a different background or error background image (the one that’s shown if things went south during onboarding).
Just add your images to the SupportFiles folder of the PSADT package and add their names to the app config file.

A different background may require different font color for the log files, so you can change these as well:

Final script of workflow
It’s not relevant what you do during your Freestyle onboarding workflow, but the very last step is critical (for this specific use case). You want your users to be able to be productive once they receive their computer, so we have to revert the changes we made to enable the custom Shell feature and trigger a reboot.
Have a look at the script I used on Github. You may want to edit the new local admin username on line 59 (or remove the command entirely).
Notice that the reboot command waits for a few minutes before actually rebooting the computer. This is to allow the Hub app some time to report back that it has successfully finished the entire process. If the workflow isn’t marked as completed in the UEM console, it might re-execute the last script again after some time.
Unattend.xml file
You can find an example unattend.xml file on my Github.
The most important part is that you set the AutoLogon part in your unattend.xml, for example:
<AutoLogon>
	<Username>Administrator</Username>
	<Enabled>true</Enabled>
	<LogonCount>9999999</LogonCount>
	<Password>
		<Value>XXXXXXXX</Value>
		<PlainText>false</PlainText>
	</Password>
</AutoLogon>
Here’s the instructions to encode the admin password. The AutoLogon settings get removed again with the cleanup script from the previous section (on line 61).
How to get started
- Download the PSADT package from Github.
- Optional: unzip the package.
- Optional: add your custom logo, background and error background images to the SupportFiles folder.
- Optional: Modify the application configuration in the WorkspaceOneOnboardingApp.exe.config file, located in the SupportFiles folder.
- Optional: add everything to a zip file again. Make sure to keep the same folder structure in the zipped bundle.
- Upload the package to your Workspace ONE console
- Uninstall command: Deploy-Application.exe Uninstall
- Install command: Deploy-Application.exe
- Detection rule: App Exists – {4E02E692-FFDF-40E8-860C-399EE62B961D}
- Add the app to your PPKG in Devices -> Lifecycle -> Staging -> Windows
- Download the PPKG and unattend.xml files from the console.
- Edit the unattend.xml to include the AutoLogon section.
- Add the cleanup_and_reboot.ps1 script as the final step of your onboarding workflow.
- Follow the default procedure to install the PPKG and unattend.xml to a test computer or VM using the Provisioning Tool.
- Lean back and enjoy the show.
Some final remarks
- I’ve tested the app using Drop Ship Provisioning both for the Workplace and Azure AD – Premium flows using Windows 11 22H2 Professional and Enterprise.
- Please do reach out if you bump into issues, have a brilliant idea to improve the app or just want some help getting started!